No-knead bread is a simple method to make great quality bread at home with very little effort. In total, this recipe usually only takes about 10 minutes of actual work. This recipe is adapted from this video here by artisanbreadwithstev. To read about my history with no knead dough you can click here.
For this recipe you’re going to need two loaf pans. If you only own one, you can alternatively place a baking pan filled with water on the bottom rack of your oven to create the steamy environment ideal for oven spring. What is oven spring you might ask? Thekitchen defines oven spring as “the final burst of rising just after a loaf is put in the oven and before the crust hardens”. During this time the reason you want steam in the oven because it helps keep the surface of the loaf moist, which ensures that it is able to expand easily. This is the reason why professionals use what is called a steam injection oven, which injects steam into the oven during the initial baking period.
In my experience, I have personally found that a 8.5 – 9” bread pan works best for this recipe and especially ones with a flat rim like this. A flat rim makes for a tight seal when using binder clips to clip the two pans together as show below.

No flat rim? No problem! You don’t need to have bread pans with a flat rim to use this method, but it is definitely easier if you have one that is flat.
Active time: 10 minutes
Proofing time: 6-19 hours
Ingredients:
- ¼ teaspoon active dry yeast or instant yeast (doesn’t matter which)
- 1 ½ teaspoon salt (any kind will do as long as it’s non-iodized salt)
- 3 ½ cups bread/all purpose flour
- 14 oz room temperature water
Directions:
- In a large bowl, add your flour, salt, and yeast. Whisk until combined.
- Add your water to the dry ingredients and mix with a rubber spatula until fully incorporated. The dough should be sticky and shaggy, but not liquidy. If that is the case add a little more flour and if it is too dry add a little more water. The no-knead method is very forgiving and I have had good results even when things are not exact.
- Cover the bowl with plastic wrap and let proof for 6 – 18 hours (I prefer the 6 – 8 hour range) on your counter-top.
- After proofing the dough should have at least doubled in size and should be covered in bubbles on the surface. Scrape the sides of the bowl and lightly fold the dough onto itself a few times to knock out some of the excess air bubbles.
- Scrape the dough into a greased loaf pan, cover it with another greased loaf pan, and then clip together with binder clips. Set aside for another 30 minutes to an hour to proof.
- Preheat your oven to 400°F, 15 – 30 minutes before your proofing time is up (this depends on how long your oven takes to head up).
- Once your oven has finished preheating, place your bread into the oven and set a timer for 40 minutes
- After 40 minutes have elapsed, remove your bread from the oven and remove the binder clips and top loaf pan. If you wish to get a darker crust on the top you can place back into the oven for 10 – 15 minutes.
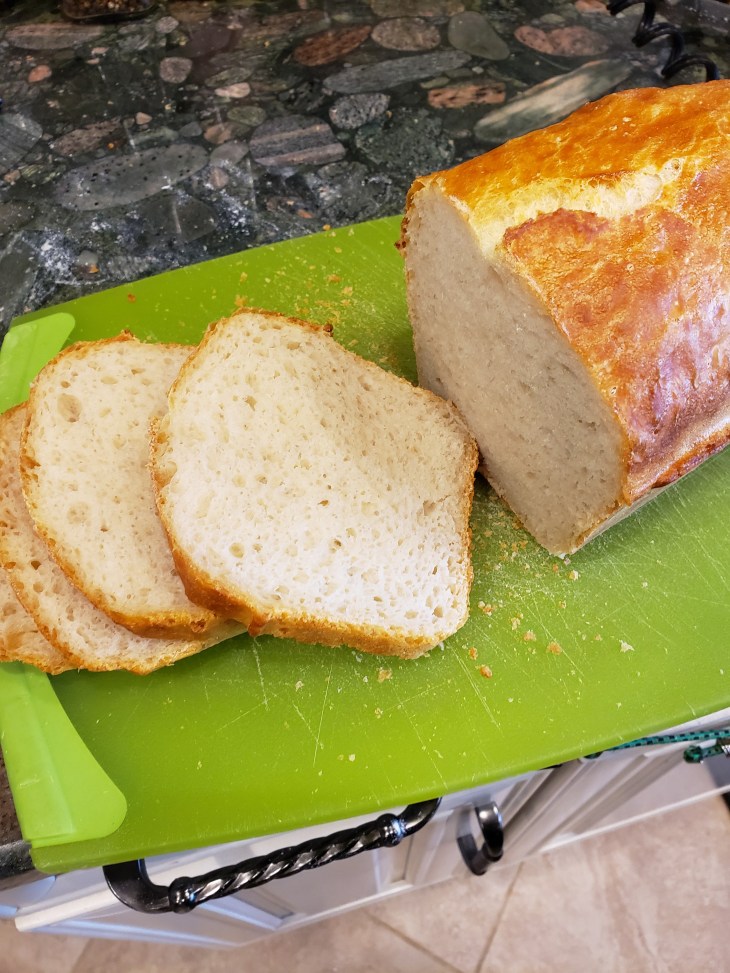
- After you have finished baking remove the loaf from the pan and let cool on a wire rack. I do not recommend cutting into the bread while it is still hot as steam will rapidly escape leading to a drier bread later on.
Note: If you wish to make this recipe with whole wheat flour I suggest maybe only using 3 cups of flour instead of the 3 ½ or using more water as “the germ and bran that are present in whole wheat flour can absorb more liquid [than regular flour]” according to abreaducation
As an amazon associate I earn from qualifying purchases.

2 thoughts